For this challenge we were to make something using the color black. Black is easy for me since I tend to use it a lot in my projects, but what to make? Stumbling on $1 skull bead bracelets in the check out line at Michael’s made my decision for me.
Recently, I got my first pair of reading glasses (mainly so I can see to thread a needle). My friend Daria and I were joking around about how reading glasses meant we were getting old and that now we needed gaudy beaded chains to wear them around our necks. Well of course, that meant I had to make her one. It was easy to find the ends for eyeglass chains, but I really wanted skull beads. I couldn’t find anything small enough or in the right color. (I could find all the large rainbow colored skull beads I could every want though.) Those little bracelets with their 1/4″ grey skulls couldn’t have been more perfect.
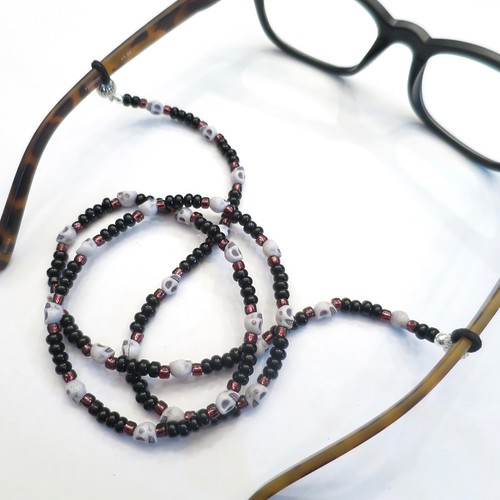
This was a quick project and simple enough for someone like me with only basic jewelry making skills. I stuck mainly to plain black and the skull beads, but I wanted a little shine so I added in some dark purple glass beads too. (I was going to use the silver beads that came on the bracelets, but decided they were pretty cheap and going to lose their shine with wear.)
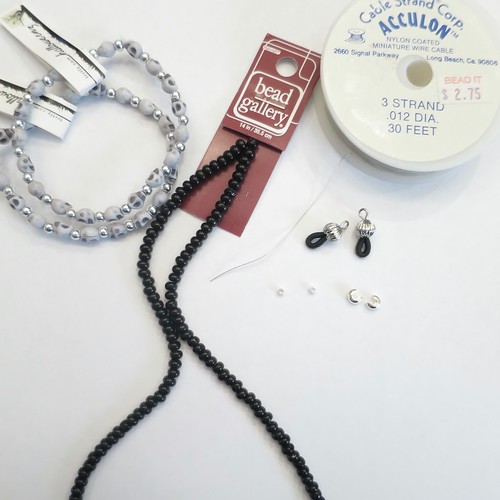
I used a nylon coated miniature wire cable as the base of my chain. I wanted something that wouldn’t stretch because I didn’t want the glasses to pull it down and make spaces between the beads. I also wanted something that wouldn’t break easily.
Beaded Eyeglass Chain
Supplies:
- thin beading wire
- utility scissors or wire cutter
- two eyeglass chain/holder ends
- two crimp beads
- two crimp bead covers (optional)
- small pliers
- beads
1. Attach one end – Cut a piece of wire at least 2″ longer than you want your chain, my finished chain is 27″ long. Fold over one end of the wire about 1″. Put the wire through the loop on one end piece at the fold.
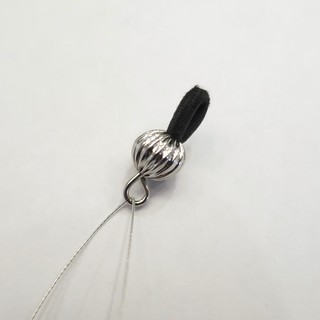
Slide a crimp bead onto the wire from the other end. Bring it right up to the loop of the end piece with both the main wire and the folded over piece through it. Use the pliers to press the crimp bead tightly around the wires attaching the end.
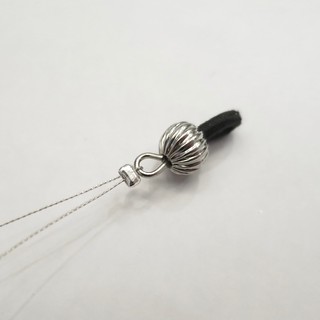
If you are using a crimp bead cover, place it over the crimp bead and use the pliers to close it.
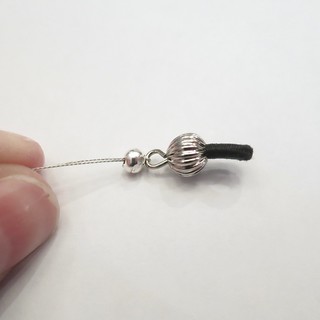
You will hide the short folded over end of the wire in the beads, but you can trim in shorter if you wish.
2. Add beads until the chain is the desired length. (Remember, you will still be adding a second end piece.) The nice thing about using wire is you don’t need a needle.
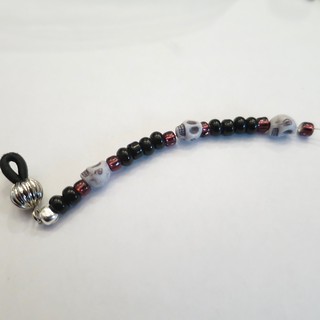
If you are using beads that have a direction like my skull beads, make sure to change the way you string them on at the middle of the chain.
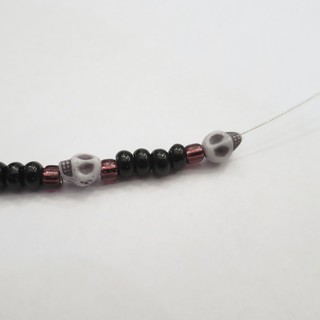
3. Attach the second end piece – After you have strung on all the beads you want, string on a crimp bead. Then string on the second end piece.
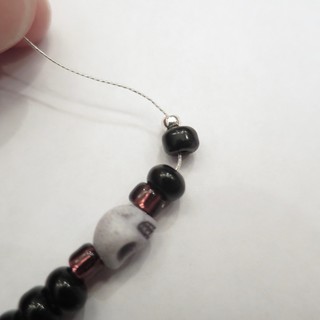
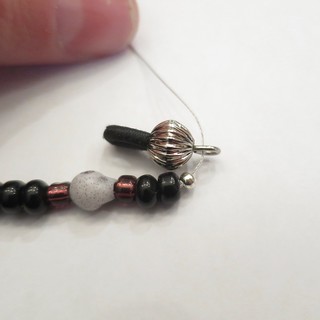
Take the end of the wire, fold it over the loop of the end piece and put it back through the crimp bead and a bead or two. Pull it tight so that there isn’t a space between the end piece and the beading.
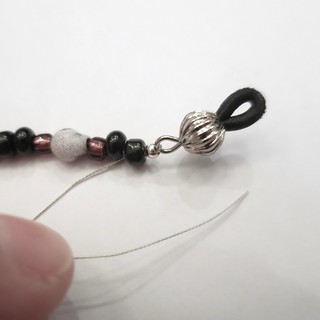
Use the pliers to press the crimp bead tightly around the wire. Add the crimp bead cover. Trim the wire.
Now I don’t think that is the eyeglass chain of an old lady 😉
© 2005 – 2015 Kathy Lewinski & Susan Cornish


