For the 8 Weeks to a Sweater project, I’ve decided to do the Dawn cardigan by Hanna Maciejewska
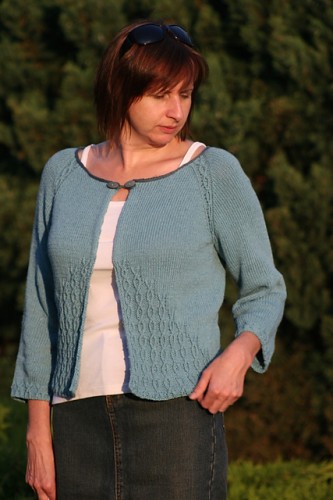
This pattern is available as a free download on Ravelry and like a lot of free patterns, it does not include a schematic. It was time to get out a pencil and calculator and draw up my own. Don’t worry this is easier than it sounds as long as you know your gauge. You don’t need to know how to sketch or draw for this, it’s the measurements that are the most important.

(You can see how I jot down notes figuring out the number of rows and stitches on the pattern to help me do my calculations.)
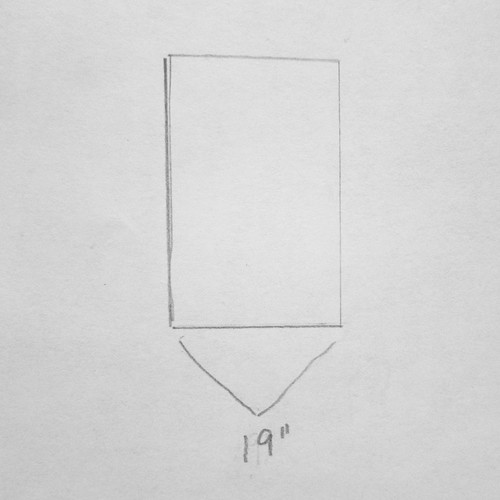
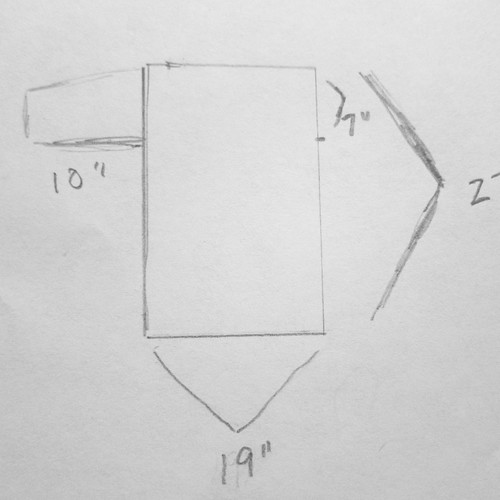
First, I figured out how wide the sweater is going to be. I know the body of my sweater has 212 stitches around the body and my gauge is 5.5 stitches per inch, so the sweater is 38.5 inches around. When I draw this I am only drawing the front of the sweater so I divide that 38.5 by 2 to get a measurement of 19 inches. Because my sweater has no waist or bust shaping I don’t need to do any other width measurement. (Just to give myself a little scale I drew my schematic so 1/8″ = 1″.)
If your sweater does have shaping, figure out the width in the same way at the largest and smallest places in the pattern the same way we did above. Then figure out how far apart those places are by dividing the number of row by the number of rows per inch in your gauge. In this case your schematic may look something more like this.
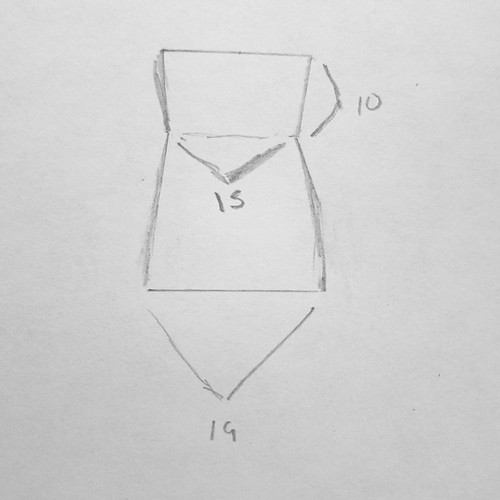
Next, I figured out the length of my sweater by dividing the number of row by the number of rows per inch in my gauge. Sometimes your pattern won’t give you a number of rows to knit, but instead gives you lengths you knit to different sections. Add these lengths together to get the total length. My sweater says to just knit to desired length, so I didn’t need to worry about this in my schematic and just drew it to a length I want.
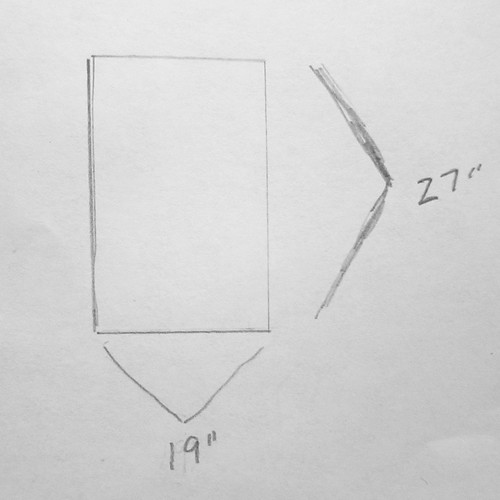
Next I added the sleeves. My sleeves are 80 stitches at the top, so I 80 divided by 5.5 (my stitches per inch). This tells me my sleeve is 14.5 inches around. My arm hole length will be half of this 7.25. For the length, I figured out how many rows the pattern had me knit and divided that by 6.5 (my rows per inch) for a length of 10 inches.
Finally, I figured out the width and depth of the neckline and drew that in.
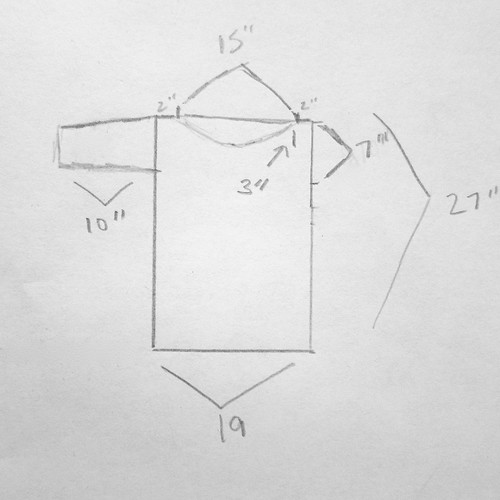
So, what does this all tell me? Well, I compared these measurements against a sweater that already fits me well. I know now that I need to increase the width by 2″. I also know that a 7.25″ armhole is a little too tight on me so I’ll need to increase that as well. Luckily, the pattern explains how to size the sweater up but adding more raglan stitches until the size is correct. This will not only increase the width, but also lengthen the armhole.
I considered increasing the size by knitting in a larger gauge, but after doing the math realized that would make the sweater too big. How did I know this? Well, if my gauge was 5 stitches per inch, the 212 stitches would give me 42.5″ as my width. That’s 2.5 inches more than I want it to be. Isn’t it amazing how much .5 stitches can change a size over a length?
© 2005 – 2012 Kathy Lewinski & Susan Cornish



I just found this link today. I found a sweater in an old magazine with bigger shoulders. I think I can do this. Thank you. Ellie
This is wonderfully helpful, can you do more posts like these where we can follow along? There are times when I simply don’t have the money for the yarn to do the project, but I seriously need to learn how to shape sweater and other clothing to fit my body.
Sincerely,
Cropperhopper
Pingback: How to Draw Your Own Schematics · Knitting | CraftGossip.com
You know, I have never bothered with a schematic before, but this post has made me see just how useful they are! And it really appeals to the math geek in me, which is a nice bonus.
This is such a great idea. I am going to bookmark this for the next sweater I make. I want it to fit me as well as my most recent sweater, and now I have a way to make sure that it does 🙂