I had the opportunity to make a present for a friend. He is an experienced cook and did not have an apron last time we saw him. He is English and his wife is American (like us), so I had the idea to make an apron either would wear.
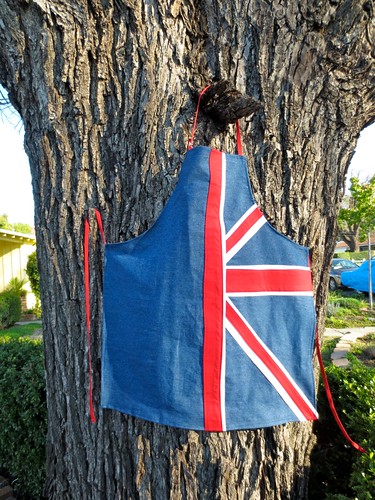
Union Jack Apron
Supplies
- 1 yd denim (52′ wide) (or buy a pre-made blue or denim apron)
- 1/4 yd white cotton
- 1/3 yd deep red cotton
- 2 1/5 yds of red woven webbing
- 2 d-rings to fit the webbing
- denim blue thread
- white thread
- red thread
- 1 yd fusible web
- rotary cutter
- quilter’s ruler
The finished apron is 9″ across at the neck, 27″ across at the largest part, and 33″ tall from the neck to the knee.
1. Apron First you will cut out an apron from the denim. You can use a favorite apron that you have in your house as a template. Just remember that you will need to turn under a hem all the way around. So, when you cut, add an extra inch all the way around.
2. Assemble Stripes I made the stripes in layers next. Cut strips of red and strips of white. For the big stripes I cut 4′ of red and 5″ of white. For the diagonal stripes I cut 2.5″ of red and 4″ of white.
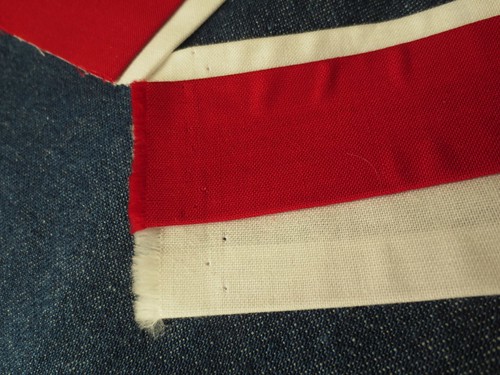
As precisely as humanly possible, iron down 1/2 inch on each side of each strip. Once you are satisfied, cut slices of interfacing just smaller than each stripe. Iron the red stripe onto the white stripe. There are some important subtleties about the stripes that I will point out here.

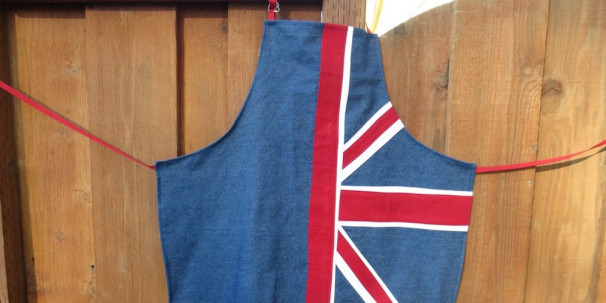
If you look carefully at the diagonal stripes, the white on one side is thicker than the other. So when you iron them in place, be sure to do that a little bit off center. In the main cross, the red is the dominant color. It is forward, and rides OVER the white. (note here: look at the picture above for reference. Not the apron. I did not get this correct on the apron, and I officially apologize to all offended.)
I made the larger stripes together and then used a rotary cutter to trim the large vertical stripe. I cut one side off and ironed down a new hem.
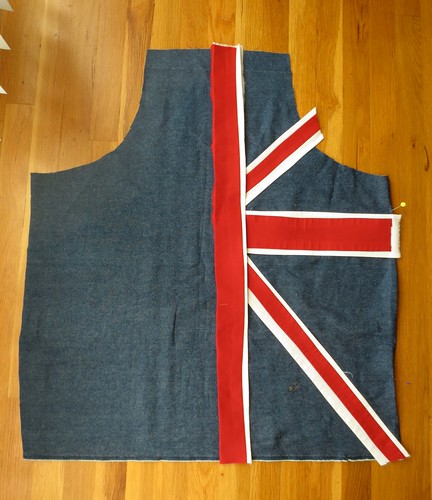
This shows the apron cut and the stripes laid out in their positions.
(Here, do as I say, not as I did, roll back a small section of the white trim when the red intersects. Then it will be correct.)
Once you have all the stripes in place set down more strips of interfacing and iron the stripes in their place.
The finishing touch is to sew all the stripes down. This will give the apron strength and longevity. (It will be washable, and the interfacing will not wash away in years to come. )
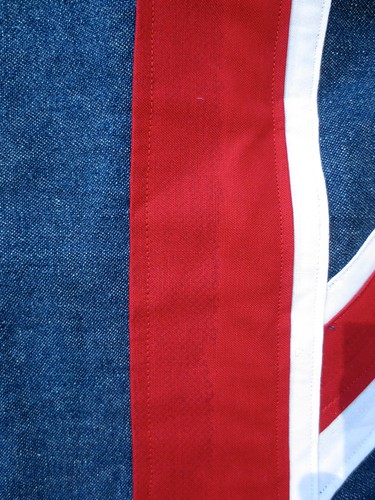
I top stitched a line down the red on both sides and down the white on both sides. I think it gives it a professional finish.
3. Hem Turn over 1/2 inch, 1/2 again (double turn) and sew down all sides in a neat hem.
4. Add Straps Cut the webbing into about 3 equal sections. Fold over one end of each strip and sew it down to “finish” it off. Add one tie on the back of each waist corner of the apron. From the unfinished side of the last strip, cut about 4″ off and form a loop. Catch the two d-rings and sew them down into the loop. Take the remaining strap and attach it to the other corner.
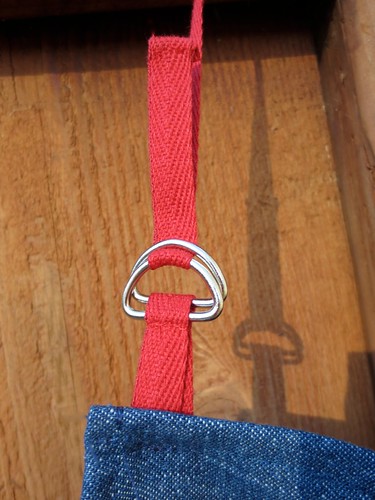
It’s finished! May you only cook the best that both countries have to offer! Enjoy!
If you are not reading this post in a feed reader or at http://justcraftyenough.com then the site you are reading is illegally publishing copyrighted material. Contact us at jcraftyenough AT gmail DOT COM. All patterns, text and photographs in this post are the original creations & property of the author unless otherwise noted.© 2005 – 2015 Kathy Lewinski & Susan Cornish



Pingback: The Queens Platinum Jubilee - Keep Britain Sewing