For this Iron Craft challenge we were to make something using light or pertaining to light. I had an idea for a modern wreath for my mantel. The original idea was to cover a metal wreath form with clear glass balls and light it up from behind with Christmas lights. The more I thought about it, the more tweaking the idea needed.
My wreath form was green (I should have bought a silver or white one. I did paint my white but a lot of the paint scraped off while I was working with it.) and I didn’t want the green showing through the clear glass balls. Plus, all the light cord was going to show through and I know never be neat enough for me. The solution was to find frosted balls that would still let light through and yet hide the works behind.
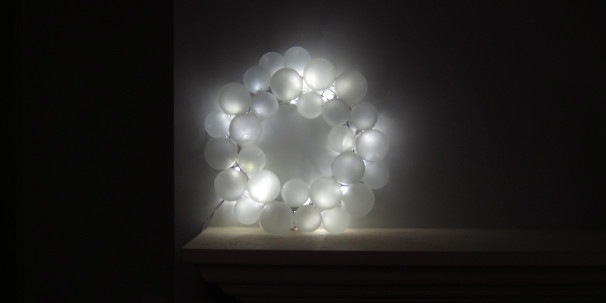
Well, that sounds simple right? Ha! Try finding plain frosted balls. (Target did have some, but I would have had to buy them as part of a set with other colors and only in one size.) The solution was frost clear balls myself. I picked up different size clear balls at Target and for 50% off at Michael’s. (At normal price Target is cheaper than Michael’s, but has less size options.) I had some glass etching solution, but that stuff is pretty intense requiring the use of gloves, a mask and ventilation. What I found instead was Martha Stewart’s Frost Etching Effect. Here are the results…
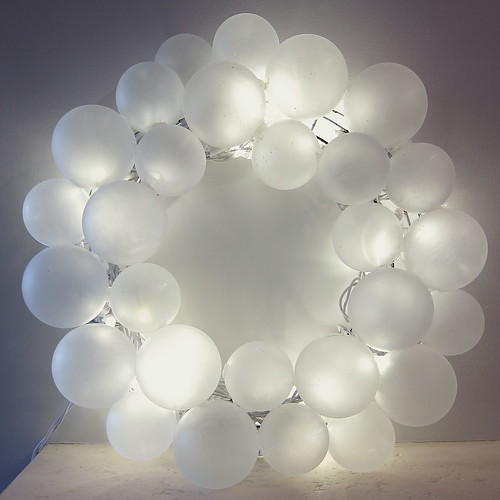
I love it. It’s clean and modern, just what I wanted. Plus, surprisingly easier to make than I thought, once I got the hang of it.
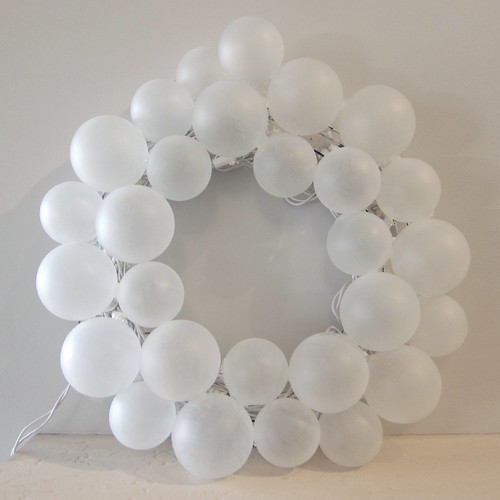
Some notes on the Frost Etching Effect. It gave just the slightly opaque look I was going for, but it took a little trial and error to get it right. You can use it as is or tint it with acrylic paint. On its own it was very light, I found a little paint helped a lot, but if you use too much it’ll just look like paint not frost. I tried both white and silver paint and found the silver gave the nicest result. (I may just have gone to heavy with the white.) Then the trick was getting it on the glass balls. I tried sponges, dabbers, paintbrushes and a soft cloth, all gave pretty streaky coverage. Finally, I tried my finger, that was the way to go. It will look a little streaky especially on the first coat, but a second coat will dry pretty smoothly. The trick is to make sure to get a thin, even coat and let it dry completely before doing the second. Here is the difference between one coat and two. You can see coat two is less streaky and less see-through.
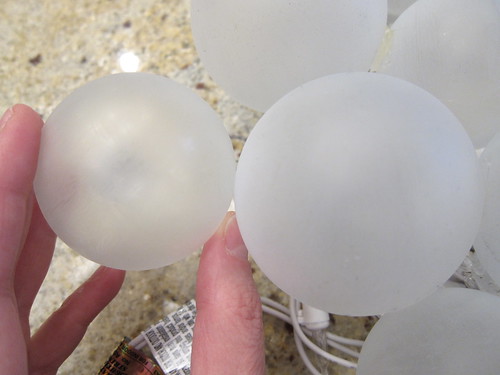
Because you are not really etching the glass, this frosting can scrape off especially when rubbing two frosting balls together. So don’t mess around with them too much when gluing them on the wreath form.
Lit Frosted Ball Wreath
Supplies:
- Clear glass Christmas balls (I used 14 55mm balls and 13 larger balls, there was no size listed on the package. I wish I could have also found tinier ones) or, if you can find them, pre-frosted balls (this wreath is a snap if you can find these)
- Martha Stewart Frost Etching Effect (skip if you bought pre-frosted balls)
- Silver, white or grey acrylic paint (skip if you bought pre-frosted balls)
- Metal wreath form in silver or white, mine was 12″
- String of white Christmas light (try to get a string with a white cord). I used a string of 60.
- Zip ties, yarn, string or something else to tie the lights to the wreath form
- Hot glue sticks
Tools:
- Hot glue gun
1. (If you have bought pre-frosted balls you can skip to step 2.) Frost the balls – Mix about 2 teaspoons or so of the Frost Etching Effect with a few drops of the acrylic paint. I only made a little at a time because I didn’t want it to dry out. It goes a long way since you are doing such thin coats.
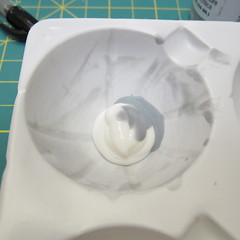
You really want just a little of the color or it get looks just like paint when you use it, not frost. Stir together.
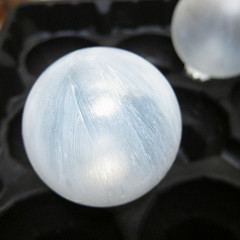
Coat the balls with a thin coat of the frost/paint using your finger. Let the first coat completely dry. It is important to let it dry completely or you”ll just wipe it off when you apply the second coat. Apply a thin second coat and let dry again. You can add more coats it you want, but two seemed good enough to not see through.
2. Put the lights in the wreath frame – I did this by securing the ends of the light sting to the frame with a twist tie. Then I just filled in the rest of the frame, tying it in a few places.
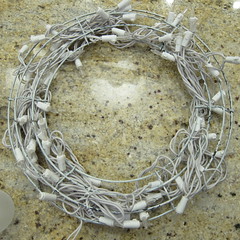
The frame is curved and you are putting the lights inside the curve.
3. Hot glue the balls to the frame – Take the metal ends off the balls if you haven’t already. Work around the frame mixing up the size of the balls. Glue the balls to the wreath form and each other. Be generous with the glue.

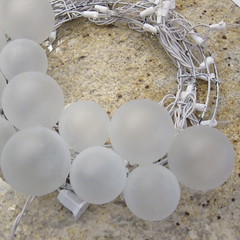
Be careful not to touch the hot tip of the glue gun to the glass balls, I had one break from the heat. Fill the whole wreath and you are done. Hang and enjoy!
© 2005 – 2013 Kathy Lewinski & Susan Cornish



Pingback: DIY Frosted Ball Wreath For Winter Decor | Shelterness
Pingback: Amazing DIY Frosted Ball Wreath
Pingback: Top 10 Embellished DIY Christmas Lights - Top Inspired
Pingback: 21 DIY Christmas Wreaths Filled With Holiday Cheer
Pingback: 21 DIY Christmas Wreaths Filled With Holiday Cheer | Prepper's Survival Homestead
Pingback: 50 IDEIAS DE NATAL - Amanda que fez
Pingback: 28 guirlandas para pendurar em casa neste Natal | CASA.COM.BR
Pingback: Faça você mesmo: 88 ideias para ter um Natal inesquecível | CASA.COM.BR
Pingback: 30+ Festive DIY Christmas Wreath - Listing More
Pingback: Faça você mesmo: 88 ideias para ter um Natal inesquecível – Morada Móveis
Pingback: 88 Ideias para decoração de Natal que você mesmo pode fazer – Jornal Cidade
Pingback: 10+ DIY Christmas Wreaths for Front Door
Pingback: 12 DIY Christmas Wreaths for Front Door
Pingback: Especial Natal 🎄|DIY: Ideias Para Ter Um Natal Inesquecível – Beijos, Blues & Poesia ❤
Pingback: Decoração de Natal: 88 ideias faça você mesmo para um Natal inesquecível - Duall Shop
Pingback: Decoração de Natal: 88 ideias faça você mesmo para um Natal inesquecível - Decora More
Pingback: Decoração de Natal: 88 ideias faça você mesmo para um Natal inesquecível - More Duall
Pingback: Decoração de Natal: 88 ideias faça você mesmo para um Natal inesquecível - More Decora
Pingback: Decoração de Natal: 88 ideias faça você mesmo para um Natal inesquecível - More Shop
Pingback: Decoração de Natal: 88 ideias faça você mesmo para um Natal inesquecível - (dezembro 2022) Lar Life
Pingback: Decoração de Natal: 88 ideias faça você mesmo para um Natal inesquecível – Agência de Notícias 1 – Jornal Floripa