This is the third hooded towel that I have done. (To follow my progress, first was the plain version and next was the shark hoodie.) This one is done for a little dinosaur lover that we know.
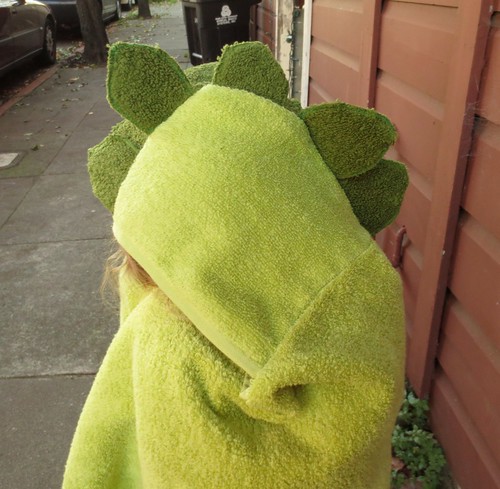
Stegosaurus Hoodie Towel
Supplies:
- 1 large light green bath towel
- 1 matching light green hand towel
- 1 contrasting dark green hand towel
- thread
- stiff interfacing (iron-on on at least one side)
- scissors
- sewing machine
Directions:
The directions for the hood itself can be found in the original post. Hoodie Bath Towel. Read through that post to get an idea of where you are going.
For this towel, we will make the plates for the head first. I drew a paper template for one plate first. The towel should be folded, long ways, each long side folded to the middle line, and then the whole thing folded in half. (This way, you can cut them two at a time, through 4 layers of fabric)
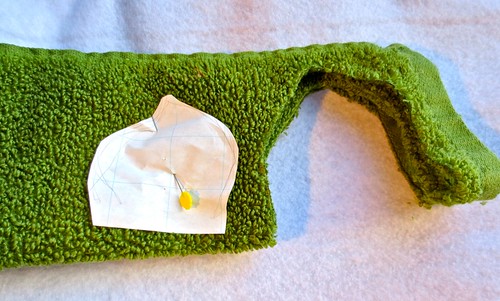
Cut a little bit bigger around the template on the terry cloth. I cut 10 plates, and ended up using 9. (Cut 10 to be on the safe side.)
Then, using the same template, cut out plate shape from the interfacing. For these, cut close to the edge, true to the paper. (Then the interfacing will fit in the middle of the terry cloth, and allow for the seam.)
Keeping the pairs that you cut together, open them up (like two pieces of bread, just separate them), iron the interfacing down onto one side, and then close the sandwich up, and pin them together. (I never found super stiff iron on interfacing with two-sided sticky. but if you DO, more power to you! Iron on the other side now.)
Note: On the Shark Towel that I made, I made teeth. I used white terry, and turned the teeth inside out. It proved to be very tricky. So for the plates, I used a different technique.
Take the plate “sandwiches” you have made (terry, interfacing stuck to one side, terry = sandwich) and zig-zag around the edges. They move around a little bit, and that is a lot of fabric to run through a (my) sewing machine, so check them, and see that you caught both sides of the fabric all the way around. Some of them you may need to turn over and go around a second time.
Hood:
Take the light green hand towel, and cut a hood out. (Be careful to line up the seams of the towel carefully so that the thinner side seams are the bottom (neck) edge of the towel, and the stiffer “bottom” seams on the hand towel end up framing the face.)
Open the hood up, and arrange the plates. They should be organized in layers, with the rough edge facing the seam of the hood.
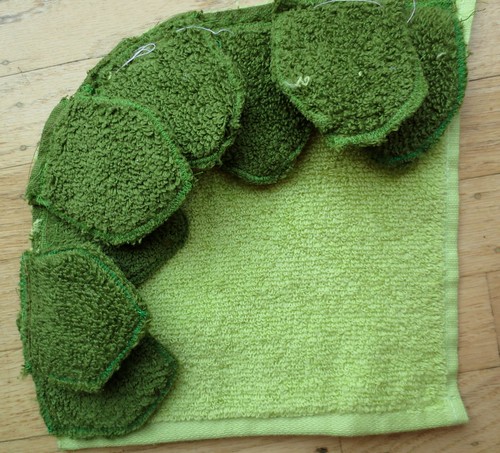
To make the plates point out to each side, set up two layers, staggered. A bottom layer, and then a second layer. Be sure to leave a 1/2 inch at the neck edge for a seam allowance.
Baste the plates to one layer of the hood so that they stay in place. (In the picture above, you can still see my baste stitches in white.) Set the second layer of the hood on top. Then stitch the hood together. Go across this seam several times for strength, as the hood will really take a beating.
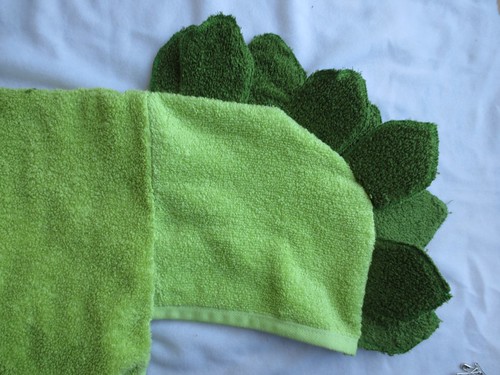
Next, open the hood up, find the center of the bath towel, and line that up with the center seam of the hood. Attach the hood to the bath towel.
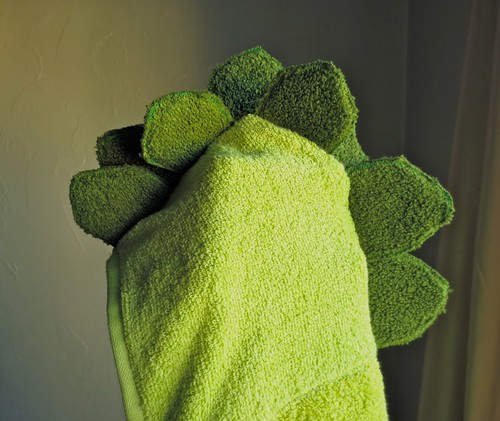
And Enjoy!
© 2005 – 2013 Kathy Lewinski & Susan Cornish




This looks like it would be really popular with the kid set. Very adorable!
The little dinosaur lover LOVED this! She wore it all day at school and was talking about how she was going to bring it to swimming class on Saturday. Thank you!
If they had body towels in the right colors–I would so make one of these and wear it at the gym. No, seriously. I would. I love these sets of hooded towels you are making.
This is SOOO adorable and I hope you don’t mind if I share this on my blog. I just finished my first set of kid’s hooded towels and LOVE this idea for boys!
Thanks and GREAT JOB!!!
Pingback: Stacy Sews - Diary of a Fabric Junkie » Blog Archive » Linky Thursday