*** Apparently, I spelled Goldy wrong! I apologize to all the Minnesota fans out there 🙂
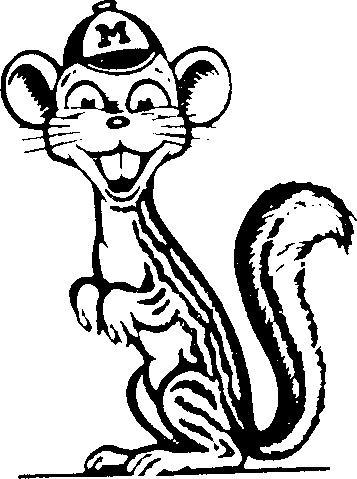
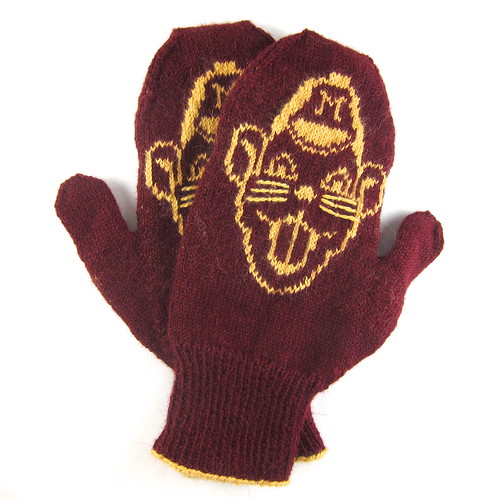
If you’ve been following the blog you know that I’ve knit two pairs of University of Michigan mittens and one pair of University of Minnesota. I still had one pair of Minnesota ones to make for Jenny’s husband Andy. I had let everyone have some design input into their mittens and Andy’s request was that I do something with the retro Goldie Gopher.

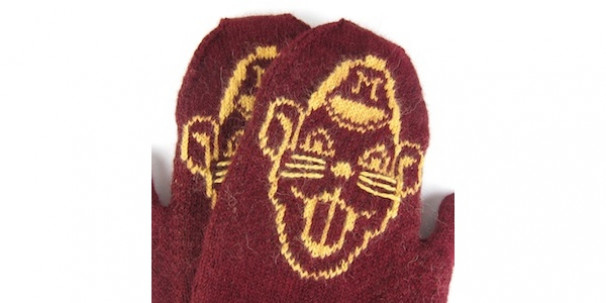
Originally, I had wanted to do the whole body with the tail in the thumb, but after sketching it out I realized I’d have to do a really tiny gauge to get any detail. So instead I just did the face,

I really love how these turned out and they were a big hit at the football game. I think this might be the start of my design for next year’s state fair entry.

Goldie Gopher Mittens

These mittens were knit for a particular person, so they are sized for a man’s hand that is 10″ wide and 8 1/2″ long. It is easy to make them longer or shorter by adding or removing rows. If you want to make then skinnier, you will need to knit in a smaller gauge as you need 40 stitches across to fit the pattern. So say you wanted to make mittens that were only 8″ around (a typical woman’s size), your gauge would need to be 10 stitches to the inch.
This pattern has not been test knit, so please let me know if you find any errors.
Download the Goldie Gopher Mittens Pattern and Goldie Gopher Chart
Supplies:
- 2 balls Blue Sky Baby Alpaca in currant (about 200 yards)
- 1 ball Blue Sky Baby Alpaca in buttercup (about 100 yards)
- 4 size US size 3 (3 1/4mm) double pointed needles (or size needed to get gauge)
- 3 stitch markers
- scrap yarn
- scissor
- tapestry needle
Gauge: 8 stitches and 10 rows in an inch
Required skills:
- knitting and purling in the round on four needles
- stranded color knitting
- following a color chart
- basic increases and decreases
- seaming with kitchner stitch
- picking up stitches
- simple embroidery
Abbreviations:
- k – knit
- p – purl
- pm – place marker
- sm – slip marker
- kfb – knit into the front and then the back of the same stitch
- m1l – make one stitch left
- m1r – make one stitch right
- k2tog – knit two stitches together
- ssk – slip two stitches as if to knit and then knit them together
Cuff:
With the buttercup yarn, cast on 76 stitches Divide between three needles. Join together in the round, being careful not to twist. Place a stitch marker between the first and last stitch to mark rounds.
Row 1: k
Row 2: Switch to currant, k
Row 3: k1, p1.
Continue in k1, p1 until the cuff is the length you desire. Mine were about 3 1/2 inches.
Hand:
Row 1: k14,kfb, k14, kfb, k15, kfb, k14, kfb, k14, kfb (81 stitches)
Row 2: k40, pm, m1r, k1, m1l, pm, k40 (83 stitches)
Row 3: k40, sm, m1r, k3, m1l, sm, k40 (85 stitches)
Row 4 – 5: k
Row 6: k40, sm, m1r, k5, m1l, sm, k40 (87 stitches)
Row 7 – 8: k
Row 9: k40, sm, m1r, k7, m1l, sm, k40 (89 stitches)
Row 10 – 11: k
Row 12: k40, sm, m1r, k9, m1l, sm, k40 (91 stitches)
Row 13 – 14: k
Row 15: k40, sm, m1r, k11, m1l, sm, k40 (93 stitches)
Row 16 – 17: k
Row 18: k40, sm, m1r, k13, m1l, sm, k40 (95 stitches)
Row 19: k
Row 20: k and start following colorwork chart (For one hand the color work will be in the first 40 stitches, on the other hand it is done on the second set of 40. Of course, you could have the gopher on both sides of the mitten and do it in both sets of 40.)
Row 21: k40, sm, m1r, k15, m1l, sm, k40 (97 stitches)
Row 22 – 23: k
Row 24: k40, sm, m1r, k17, m1l, sm, k40 (99 stitches)
Row 25 – 26: k
Row 27: k40, sm, m1r, k19, m1l, sm, k40 (101 stitches)
Row 28 – 29: k
Row 30: k40, sm, m1r, k21, m1l, sm, k40 (103 stitches)
Row 31: k
Row 32: k40, sm, m1r, k23, m1l, sm, k40 (105 stitches)
Row 33: k
Row 34: k40, sm, m1r, k25, m1l, sm, k40 (107 stitches)
Row 35: k
Row 36: k40, put the 27 stitches between the markers on a piece of scrap yarn, remove markers, cast on one stitch, k40 (81 stitches on the needles)
Row 37: k40, k2tog, k39 (80 stitches)
Row 38 – 64: k
Row 65: ssk, k36, k2tog, ssk, k36, k2tog (76 stitches)
Row 66 – 67: k
Row: 68: ssk, k34, k2tog, ssk, k34, k2tog (72 stitches)
Row 69 – 70: k
Row 71: ssk, k32, k2tog, ssk, k32, k2tog (68 stitches)
Row 72 – 73: k
Row 74: ssk, k30, k2tog, ssk, k30, k2tog (64 stitches)
Row 75: k
Row 76: ssk, k28, k2tog, ssk, k28, k2tog (60 stitches)
Row 77: k
Row 78: ssk, k26, k2tog, ssk, k26, k2tog (56 stitches)
Row 79: k
Row 80: ssk, k24, k2tog, ssk, k24, k2tog (52 stitches)
Row 81: k
Row 82: ssk, k22, k2tog, ssk, k22, k2tog (48 stitches)
Row 83: ssk, k20, k2tog, ssk, k20, k2tog (44 stitches)
Row 84: ssk, k18, k2tog, ssk, k18, k2tog (40 stitches)
Row 85: ssk, k16, k2tog, ssk, k16, k2tog (36 stitches)
Row 86: ssk, k14, k2tog, ssk, k14, k2tog (32 stitches)
Seam the top together using the kitchener stitch.
Thumb:
Put the 27 stitches on the scrap yarn onto three needles. Pick up one stitch where the thumb meets the hand. Place stitch marker. This marker will mark the rounds. (28 stitches)
Row 1: k2tog, k24, k2tog (26 stitches)
Row 2 – 20: k
Row 21: ssk, k9, k2tog, ssk, k9, k2tog (22 stitches)
Row 22: ssk, k7, k2tog, ssk, k7, k2tog (18 stitches)
Row 23: ssk, k5, k2tog, ssk, k5, k2tog (14 stitches)
Row 24: ssk, k3, k2tog, ssk, k3, k2tog (10 stitches)
Seam top together using kitchener stitch.
Weave in ends. If you want to add whiskers like I did stitch them on afterwards.
Copyright 2011 Kathy Lewinski JustCraftyEnough.com
This pattern is for personal use only. Please do not duplicate it for distribution, sell it, repost it or sell items made from it.
If you want to use it to teach knitting or for a charity event please contact me for permission.
© 2005 – 2012 Kathy Lewinski & Susan Cornish


Pingback: The Friday Feature | Lovely Wren
Pingback: candida