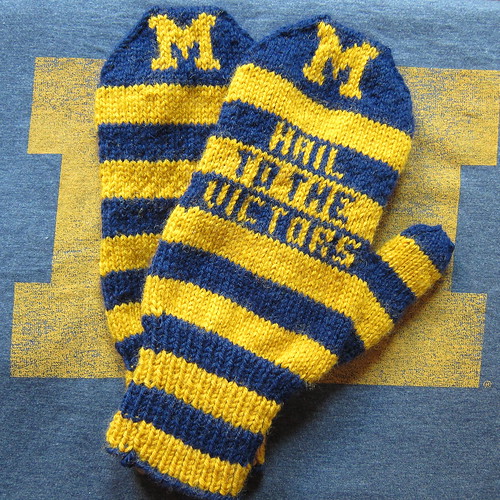
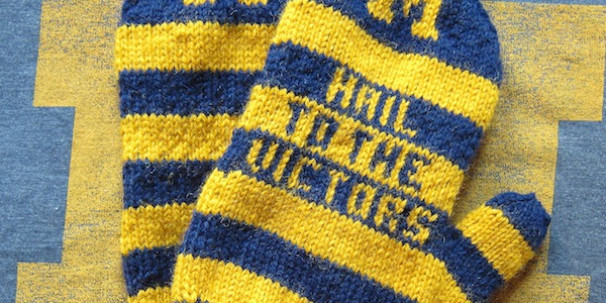
A lot of people were saying they wanted to make the Go Team mittens for a husband or father. Since I was knitting a pair for my husband, I thought I’d share the larger men’s pattern. Also a new design for University of Michigan mittens.

These mittens were designed by my husband Matt. He wanted horizontal stripes through the whole mitten. Now if you’ve ever done stripes you know that you have to do them on a knit row. Doing them on a purl will give you a bump of the other color. So, how did I get k1,p1 stipes with no bump of color? Easy. When you are changing color you knit the whole first row instead of doing k1,p1 ribbing. That knit row does not stand out in the ribbing and you get perfect stripes. (Read my post on the Women’s Go Team Mittens for how to get a jog-less stripes.)
Once again I am giving you two charts for this pattern, the Hail to the Victors chart and a men’s blank chart for you to design your own or add the charts from the Women’s Go Team Mittens.
Men’s Go Team Mittens
Makes mittens that are 9 1/2 inches around and 8 1/2 long (not including the cuff). They can easily be made shorter or longer by adding or subtracting a few rows. To make them wider cast on more stitches and adjust your decreases at the end.
Update 1/8/13: A few people have written me lately asking if I did the colorwork as I went along or if it was duplicate stitch. I did it as I went along. I carried the yarn, twisting it every 3 stitches so there weren’t long floats. You coud easily do this as duplicate stitch if you preferred though.
Supplies:
- 290 – 300 yards worsted weight yarn (I used Lion’s Brand Wool Ease)
- Four size 3 double-pointed needles
- Scrap yarn
- Tapestry needle
Gauge: 6.5 stitches and 8 rows per inch
Abbreviations:
- K – knit
- Kfb – knit into the front and back of the same stitch
- Pm – place marker
- Sm – slip marker
- M1r – make one stitch right
- M1l – make one stitch right
- Ssk – slip slip knit
- K2tog – knit two stitches together
Cuff:
Cast on 56 stitches. Divide between 3 needles. Join together to form a circle being careful not to twist the stitches. Place a marker to mark the end of the rounds.
Work in k1p1 ribbing for desired length. (see above to make a stripped ribbed cuff)
Hand:
Row 1: k18, kfb, k17, kfb, k18, kfb (59 stitches)
Row 2: k29, pm, m1r, k1, m1l, pm, k29
Row 3: k
Row 4: k29, sm, m1r, k3, m1l, sm, k29
Row 5: k
Row 6: k29, sm, m1r, k5, m1l, sm, k29
Row 7: k
Row 8: k29, sm, m1r, k7, m1l, sm, k29
Row 9: k
Row 10: k29, sm, m1r, k9, m1l, sm, k29
Row 11: k
Row 12: k29, sm, m1r, k11, m1l, sm, k29
Row 13 – 14: k
Row 15: k29, sm, m1r, k13, m1l, sm, k29
Row 16 – 17: k
Row 18: k29, sm, m1r, k15, m1l, sm, k29
Row 19 – 20: k
Row 21: k29, sm, m1r, k17, m1l, sm, k29
Row 22 – 23: k
Row 24: k29, sm, m1r, k19, m1l, sm, k29
Row 25: k
Row 26: k29, place the stitches between the markers on a piece of scrap yarn, cast on one stitch, k29 (59 stitches on the needles, 21 on the scrap yarn)
Row 27 : k27, k2tog, k26 (58 stitches)
Row 28 – 54: k (The mitten should reach the tip of the pinky at this point add or take off rows as needed)
Row 55: ssk, k25, k2tog, ssk, k25, k2tog
Row 56: k
Row 57: ssk, k23, k2tog, ssk, k23, k2tog
Row 58: k
Row 59: ssk, k21, k2tog, ssk, k21, k2tog
Row 60: ssk, k19, k2tog, ssk, k19, k2tog
Row 61: ssk, k17, k2tog, ssk, k17, k2tog
Row 62: ssk, k15, k2tog, ssk, k15, k2tog
Row 63: ssk, k13, k2tog, ssk, k13, k2tog
Row 64: ssk, k11, k2tog, ssk, k11, k2tog
Place the first 11 stitches on one needles and the second 11 on another. Join together using the Kitchner stitch.
Thumb:
Put the 21 stitches on the scrap yarn on three needles.
Row 1: k21, pick up 1 stitch from the hand of the mitten and knit them, pm to mark end of round
Row 2: k2tog, 18, k2tog (20 stitches)
Row 3 – 14: k (or to length desired)
Row 15: ssk, k6, k2tog, ssk, k6, k2tog
Row 16: ssk, k4, k2tog, ssk, k4, k2tog
Row 17: ssk, k3, k2tog, ssk, k3, k2tog (8 stitches)
You can finish the top of the thumb either with kitchner stitch or by running the tail through all 8 stitches and pulling tightly.
Weave in all ends.
Copyright 2012 Kathy Lewinski
JustCraftyEnough.com
Do not sell, duplicate for distribution or teach this pattern without permission.
© 2005 – 2012 Kathy Lewinski & Susan Cornish


CUTE!!! Any chance you’ll be listing them on Ravelry?
Ariel – They are listed on Ravelry here http://www.ravelry.com/patterns/library/mens-go-team-mittens
On the HAND pattern, there are 2 ROW 16’s:
Row 16: k29, sm, m1r, k13, m1l, sm, k29
Row 16 – 17: k
Please let me know which is correct.
Thanks very much,
Judy
Hi Judy,
Good catch. The first “16” should have actually said “15.” I must have just mistyped since it went 14, 16, 16. It is fixed now.
Pingback: Free Pattern: Men’s Go Team Mittens · Knitting | CraftGossip.com
I am sorry to be such a pain, but I have 2 more questions. 🙁
Row 27 : k27, k2tog, k26 (58 stitches)
Row 29 – 54: k (mitten should reach tip of the pinky now, add or take off rows as needed)
Should Row 29-54 be Row 28-54?
Second:Row 3 – 12: k (or to length desired)
Row 17: ssk, k6, k2tog, ssk, k6, k2tog
Should Row 17 actually be Row 13?
Thanks!
Judy
Wow Judy,
I have no idea what I was doing when I did that numbering. Think the problem is I used the Women’s pattern & just changed that numbering. That’ll teach me to take a short cut.
On the first one you are right, it should be 28-54.
On the second question it should go
Row 3 -14: k (or to length desired)
Row 15: ssk, k6, k2tog, ssk, k6, k2tog
and then the remaining rows are 16 & 17.
I have fixed the pattern in the post.
Thanks for catching this!
Pingback: Free Pattern: Men’s Go Team Mittens – Knitting