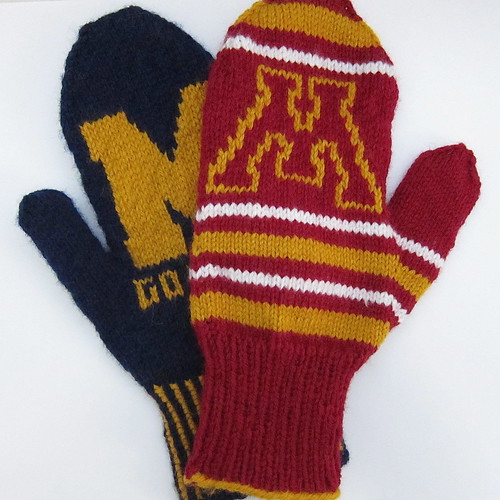
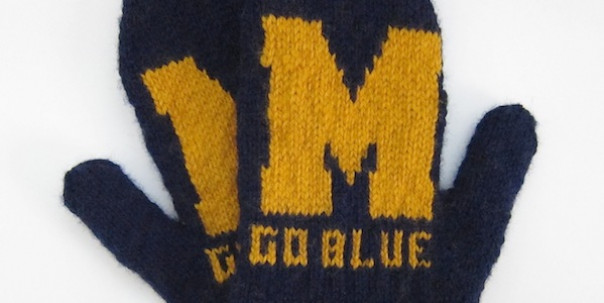
I have to admit I am not much of a sports fan, but I do enjoy watching University of Michigan football games with my husband. Generations of his family have gone to the U of M. This fall we will be going to my first live game when Michigan plays the University of Minnesota for the Little Brown Jug. To get into the spirit of the event I decided to knit myself a pair of Michigan mittens to wear to the game. (It’s outside in November in Minnesota, so chances are it’ll be cold!)
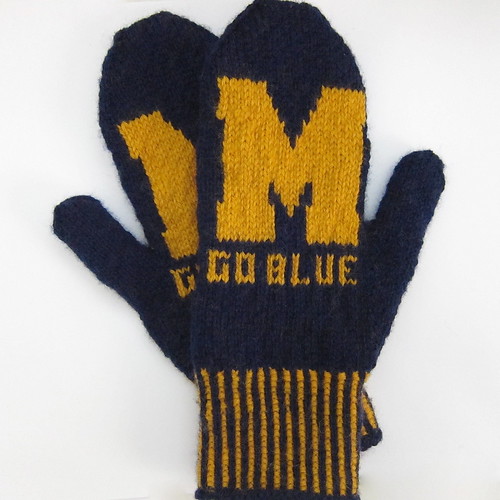
These were such a quick knit and such fun to design that I decided to knit a pair for Jenny who is also going to the game. She is a Minnesota alumni, so I had to design with a different “M” in mind.
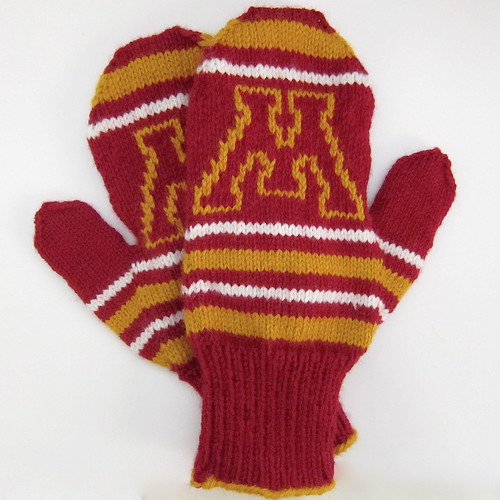
Since this pattern is such a great blank slate to make your own team mittens, I thought I would share all the tools needed to make your own.
First, you need to design the chart for your mittens. You can download a Blank Chart here. Now with a pencil and eraser, fill in squares to create your pattern. Keep in mind this chart is expressly made for a gauge of 6.5 x 8 stitches per inch. Make sure you are knitting at that gauge or your pattern will not look the same. Of course, you can also download my charts for the Michigan or Minnesota logo mittens.
Second, let’s talk about stripes. On the Michigan mittens, I did a vertically striped ribbed cuff. This effect is easy to achieve in the following manner.
Row 1: Blue Knit
Row 2: Blue *k1, sl1 purlwise Repeat from * until end of round.
Row 3: Maize *With yarn in back sl1 purlwise, p1, move yarn to back. Repeat from * until the end of round.
Repeat Rows 2 and 3 for desired length.
Basically, you are knitting one row with the blue while slipping the purls and then purling the next row with the maize while slipping the knits. This type of ribbing does not pull in as much as regular knitting, so you may want to go down a needle size when doing it for a tighter cuff.
On the Minnesota mittens I did horizontal stripes, but the mittens are knit in the round and I didn’t want that step you get when changing colors in the round.
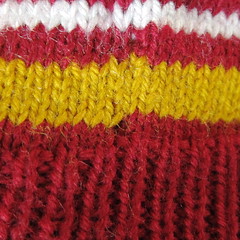
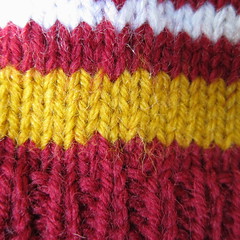
There is an easy way to get around that. When you are changing colors, knit one round of the new color. At the beginning of the second round, pull up the stitch from the row before (old color) and put it on the needle. Now knit that old color stitch with the first new color stitch. Now, you’ll have beautiful, stepless stripes.
Finally, on to the mitten pattern…
Go Team Mittens
This pattern makes women’s size 8 mittens. I have a pattern for a larger men’s size with another Michigan chart here. Download a pdf of the Go Team Mittens pattern.
Update 1/8/13: A few people have written me lately asking if I did the colorwork as I went along or if it was duplicate stitch. I did it as I went along. I carried the yarn, twisting it every 3 stitches so there weren’t long floats. I like the fact it gave me a warm, thick mitten. You coud easily do this as duplicate stitch if you preferred though.
Supplies:
- 190 – 200 yards worsted weight yarn (Lion Brand Wool Ease has good team colors)
- Four size 3 double-pointed needles
- Three stitch markers
- Scrap yarn
- Tapestry needle
Gauge: 6.5 stitches and 8 rows per inch
Abbreviations:
- K – knit
- Kfb – knit into the front and back of the same stitch
- Pm – place marker
- Sm – slip marker
- M1r – make one stitch right
- M1l – make one stitch right
- Ssk – slip slip knit
- K2tog – knit two stitches together
Cuff:
Cast on 52 stitches. Divide between 3 needles. Join together to form a circle being careful not to twist the stitches. Place a marker to mark the end of the rounds.
Work in k1p1 ribbing for desired length. (see above to make a stripped ribbed cuff)
Hand:
Row 1: k16, kfb, k17, kfb, k16, kfb (55 stitches)
Row 2: k27, pm, m1r, k1, m1l, pm, k27
Row 3: k
Row 4: k27, sm, m1r, k3, m1l, sm, k27
Row 5: k
Row 6: k27, sm, m1r, k5, m1l, sm, k27
Row 7: k
Row 8: k27, sm, m1r, k7, m1l, sm, k27
Row 9: k
Row 10: k27, sm, m1r, k9, m1l, sm, k27
Row 11 – 12 : k
Row 13: k27, sm, m1r, k11, m1l, sm, k27
Row 14 – 15: k
Row 16: k27, sm, m1r, k13, m1l, sm, k27
Row 17 – 18: k
Row 19: k27, sm, m1r, k15, m1l, sm, k27
Row 20 – 21: k
Row 22: k27, sm, m1r, k17, m1l, sm, k27
Row 23 – 24: k
Row 25: k27, sm, m1r, k19, m1l, sm, k27
Row 26: k
Row 27: k27, place the stitches between the markers on a piece of scrap yarn, cast on one stitch, k27 (55 stitches on the needles, 21 on the scrap yarn)
Row 28 : k27, k2tog, k26 (54 stitches)
Row 29 – 51: k
Row 52: ssk, k23, k2tog, ssk, k23, k2tog
Row 53: k
Row 54: ssk, k21,k2tog, ssk, k21, k2tog
Row 55: k
Row 56: ssk, k19, k2tog, ssk, k19, k2tog
Row 57: k
Row 58: ssk, k17, k2tog, ssk, k17, k2tog
Row 59: k
Row 60: ssk, k15, k2tog, ssk, k15, k2tog
Row 61: ssk, k13, k2tog, ssk, k13, k2tog
Row 62: ssk, k11, k2tog, ssk, k11, k2tog
Row 63: ssk, k9, k2tog, ssk, k9, k2tog
Row 64: ssk, k7, k2tog, ssk, k7, k2tog
Place the first 9 stitches on one needles and the second 9 on another. Join together using the Kitchner stitch.
Thumb:
Put the 21 stitches on the scrap yarn on three needles.
Row 1: k21, pick up 2 stitches from the hand of the mitten and knit them, pm to mark end of round
Row 2: k21, k2tog (22 stitches)
Row 3 – 16: k
Row 17: ssk, k7, k2tog, ssk, k7, k2tog
Row 18: ssk, k5, k2tog, ssk, k5, k2tog
Row 19: ssk, k3, k2tog, ssk, k3, k2tog
Row 20: ssk, k1, k2tog, ssk, k1, k2tog (6 stitches)
You can finish the top of the thumb either with kitchner stitch or by running the tail through all six stitches and pulling tightly.
Weave in all ends.
Copyright 2012 Kathy Lewinski
JustCraftyEnough.com
Do not sell, duplicate for distribution or teach this pattern without permission.



Those are awesome! I showed my husband because he went to Michigan and is a big fan.
Pingback: Free Pattern: Go Team Mittens · Knitting | CraftGossip.com
how hard would it be for me to make Michigan State Spartan Gloves to sell at an upcoming Craft Fair? I would love to make both MSU and UM Thanks for sharing!!
Diana – It really depends on how fast a knitter you are. But there is also a bigger issue. The team logos are trademarked and you can get in trouble for selling items you make with them on it.