If you follow fashion trends you’ve probably seen that nautical style is in, stripes, nautical detailing and classic colors. That was my inspiration for this month’s Bag of the Month.
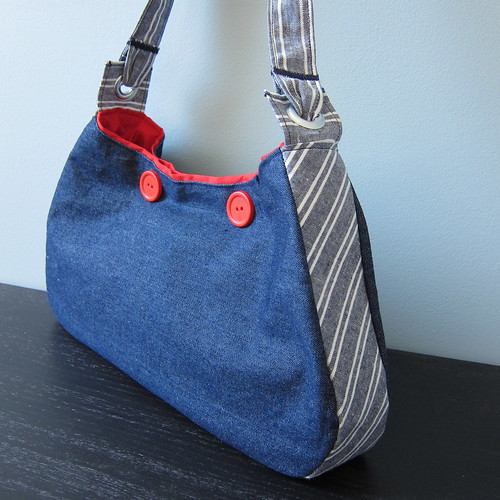
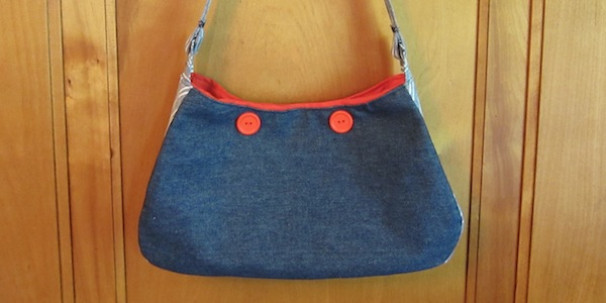
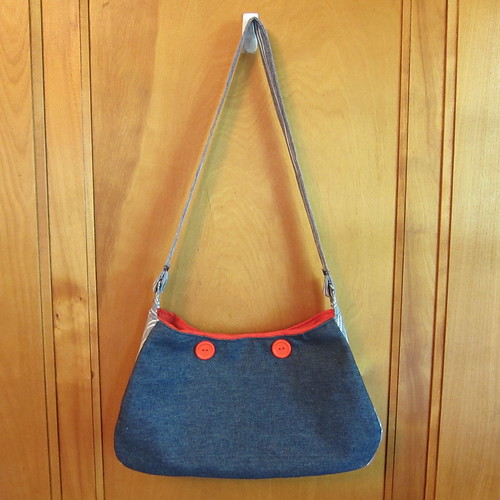
I really had fun with the stripes in this bag. They are diagonal on the bottom and sides, horizontal on the grommet tabs and vertical on the straps. The grommets on the straps make me think of the ones on sails. I was going to put one large button on the front, but the line of buttons made reminded me of sailor pants.
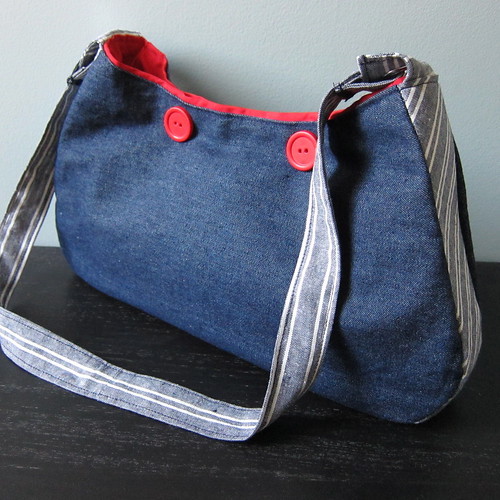
I had originally planned on sewing this bag up in blue canvas with blue and white striped accents, but could not find the striped canvas. I think the denim ended up being a great stand-in color-wise and has a good weight for a bag.
One of my pet peeves with homemade bags is that they never have enough support to keep their shape once you put something in them. With this bag I was determined to fix that. Let me tell you the Peltex Ultra Firm did the trick. This bag retains it straight bottom easily while holding my heavy wallet and other goodies.
Nautical Hobo Bag
Supplies:
- 1/2 yd dark blue canvas or denim
- 1/2 yd matching striped canvas or denim
- 1/2 yd red broadcloth for lining
- pins
- scissors
- ruler
- fabric marker
- Heavy Duty Wonder Under Fusible Webbing
- Peltex Ultra Firm Sew In
- iron
- matching blue and red thread
- 2 extra large silver grommets (If you don’t already have it, make sure to buy a grommet attaching tool which is basically a piece of plastic for the grommet to sit in and a metal piece to hammer it together. Often you can buy the grommets and tool together in a kit.)
- hammer
- large snap
- 2 large red buttons
All seam allowances are 1/2″ unless otherwise noted.
Cut Fabric Pieces:
1. Download and print out the pdf of the hobo bag pattern and cut it out. Use the pattern to cut two pieces from the blue canvas and two from the lining fabric. Fold the fabrics in half and line the straight edge of the pattern up with the fold. Make sure to cut the triangle marking the middle of the bottom.
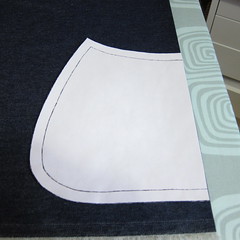
2. Cut four 15 1/2″ x 3″ strips, two from the striped canvas and two from the lining fabric. (I cut the striped strips on the bias so the stripes would be diagonal. This is a design choice, you could also do them straight.)
3. Cut two 4 1/2 ” x 3″ rectangles from the striped canvas for the grommet tabs. (I cut these so the stripes would be horizontal.)
4. Cut a 32″ x 3″ strip of the canvas fabric for the strap. (I wanted the stripes to go vertical on the strap, but didn’t have enough length of fabric that direction. So, I cut two strips each 16 1/2″ x 3 and sewed then together to create the longer strap.)
Make outside of bag:
1. Put the two 15 1/2″ x 3″ striped strips together, right sides facing, and sew one short side together creating one long 30″ strip. Press the seam open.
3. Cut a strip of Wonder Under that is 29″ x 2″. Iron it down the middle of the strip. Cut a strip of the Ultra Firm the same size. Remove the backing for the fusible webbing. Place the Ultra Firm on top and iron it down.

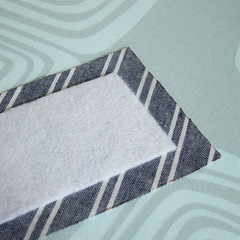
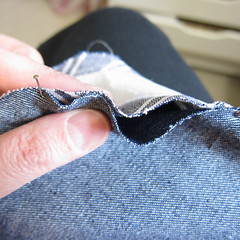
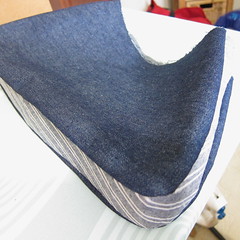
4. With right sides together, pin the strip to one of the blue sides. Match the triangle marking the center of the bag to the seam in the middle of the strip. Use a lot of pins to ease the strip around the corners. Sew the seam, leaving 1/2″ unsewed at each end.. It is a little tricky to get around the corners especially with the stiffener. I found it was best to work with the sides of the bag facing up and to work slowly. Repeat with second side.
Make the lining of the bag:
1. Put the two lining strips together, right sides facing. Sew one short end together creating one long strip. Press the seam open.
2. With right sides together, pin the strip to one of the lining sides. Match the triangle marking the center of the bag to the seam in the middle of the strip. Use a lot of pins to ease the strip around the corners. Sew the seam, leaving 1/2″ unsewed at each end. Repeat with second side.
Make the grommet tabs:
1. Fold the 4 1/2″ x 3″ rectangles in half, right sides together, creating a 2 1/4″ x 3″ rectangle. Pin and sew down both sides. Trim the seam allowance and clip the corner.
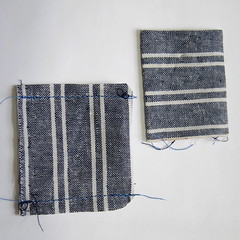
2. Turn right side out. Press.
3. Top stitch across the top and two sides leaving the bottom open.
4. Now you will attach the grommets to the top of each tab. Use one half of the grommet to mark where the grommet will go, tracing the inner circle. Carefully cut that circle out. Put the grommet through the hole then use the grommet tool and hammer to close it up (there will be instructions with your grommets showing exactly how to do this). It isn’t hard to do, but takes a little strength with the hammer. Doing the hammering on a hard surface like concrete will make it easier too.
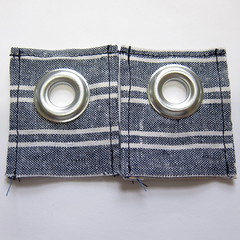
Put the bag together:
1. Press the top edge of the outside of the bag toward the wrong side 1/2″. Repeat with the lining.
2. Put the lining inside the bag with wrong sides facing each other. Match up the side seams. I found it worked best to push the seam allowances towards the front and back of the bag. Let the lining stand 1/8″ above the top of the outer bag. This gives a little pop of color and help the lining sit in the bag better. Pin in place
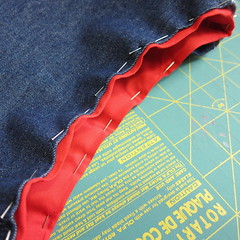
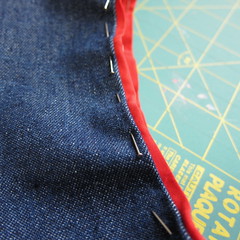
3. Pin the grommet tabs between the lining and outer fabric on the sides. Match the grommet piece to the strip.
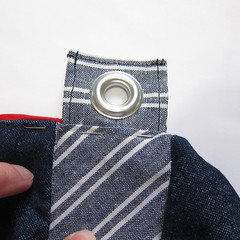
4. With red thread in your bobbin and blue thread on the needle, top stitch along the top edge of the bag.
Make and attach the strap:
1. Fold the 32″ x 3″ strip in half with right sides facing each other. Pin. Sew along the long side using a 1/4″ seam allowance.
2. Turn the strap right side out. Press.
3. Top stitch along both long sides of the strap.
4. Feed the strap through the grommets. Turn the end under and pin creating a loop through the grommet. Sew in place. I used a tight zig-zag stitch to give a nice solid line.
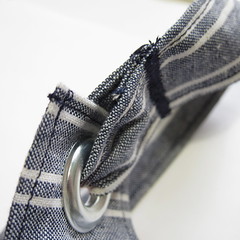
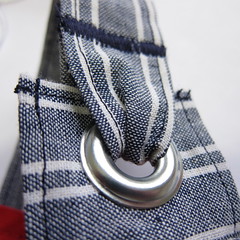
Sew in snaps and button:
1. Sew the buttons in a row on the front of the bag.
2. Sew one side of the snaps to the lining behind the buttons.
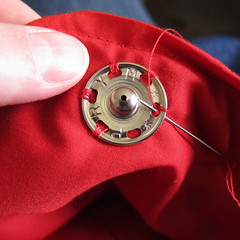
3. Sew the other side of the snaps to the lining on the other side of the purse making sure to line them up with the ones on the front.
And there you go, a new trendy addition you your wardrobe. If you make a version we’d love to see it on our Flickr group.
© 2005 – 2012 Kathy Lewinski & Susan Cornish




Pingback: Tutorial: Nautical-inspired hobo bag · Sewing | CraftGossip.com
I love it! I’ve got a ton of sail-maker’s scraps that would work great for this, plus several yards of mattress ticking. I think I can scrounge up some red for the lining and maybe even the buttons. I’m adding this to my list of projects for my bag of the week blog! Thanks for the inspiration.
Pingback: Nautical Hobo Bag - Free Purse Patterns
Pingback: Nautical Hobo Bag @Love-To-Sew.com