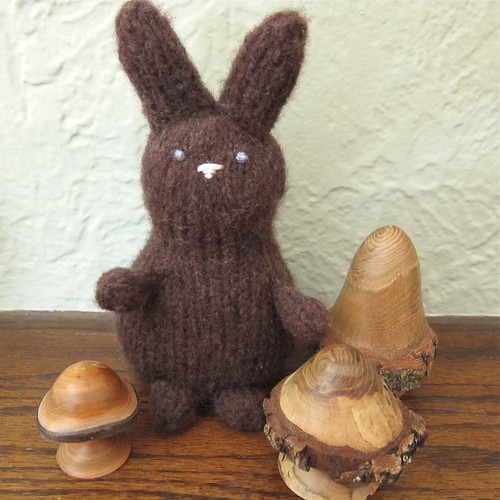
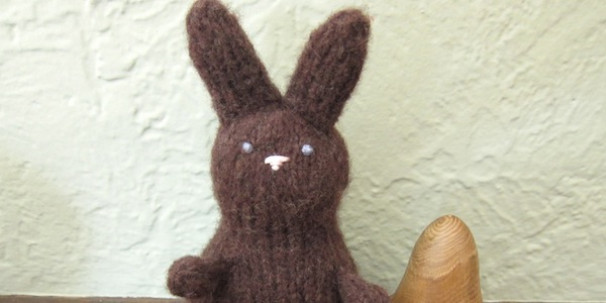
Can you believe Easter is right around the corner. Ok, it’s a about two months off, but that gives you enough time to knit up a colony of these bunnies to fill a few Easter baskets. This chocolate bunny is perfect for cuddling and won’t go to your thighs.

I made up this bunny pattern about four years ago when I wanted something special for Matt’s basket. I have been selling the pattern, but have decided this year to offer it to you all for free. If you knit one up we’d love to see it in our Flickr group.
Calorie Free Chocolate Bunny
Download the PDF of the Calorie Free Chocolate Bunny Pattern
Supplies:
- 1 ball Crystal Palace Merino Frappe (this is a slightly fuzzy, heavy worsted weight yarn)
- Four size 6 double pointed needles
- Tapestry needle
- Scrap yarn or embroidery thread for face
- Stuffing
Gauge:
6 st = 1 inch in Stockinette Stitch
Gauge is not super important here you will just get a bigger or smaller bunny, this bunny is 7.5 inches tall including the ears. Just make sure it’s rather tight so you won’t see the stuffing though your knitting.
Abbreviations:
- Kfb – Knit into the front & back of the same stitch, increasing one stitch.
- Ssk – Slip the first two stitches off the left needle onto the right needle as if to knit. Insert the left needle into the front of these two stitches & knit them together. (left slanted decrease)
- K2tog – knit two together (right slanted decrease)
Body:
Cast on 6 stitches. Divide equally on 3 needles. Join together being careful not to twist. Place a marker between your first & last stitch to mark rows.
Row 1: kfb into each stitch (12 stitches)
Row 2: knit
Row 3: kfb into each stitch (24 stitches)
Row 4: knit
Row 5; kfb into each stitch (48 stitches)
Row 6: knit
Row 7: kfb, k6, kfb, k6, kfb, k12, kfb, k6, kfb, k6, kfb, k6 (54 stitches)
Row 8: knit
Row 9: kfb, k7, kfb, k7, kfb, k14, kfb, k7, kfb, k7, kfb, k6 (60 stitches)
Rows 10-19: knit
Row 20: ssk, k7, ssk, k7, ssk, k14, k2tog, k7, k2tog, k7, k2tog, k6 (54 stitches)
Rows 21-22: knit
Row 23: ssk, k6, ssk, k6, ssk, k12, k2tog, k6, k2tog, k6, k2tog, k6 (48 stitches)
Rows 24-25: knit
Row 26: ssk, k5, ssk, k5, ssk, k10, k2tog, k5, k2tog, k5, k2tog, k6 (42 stitches)
Rows 27-28: knit
Row 29: ssk, k4, ssk, k4, ssk, k8, k2tog, k4, k2tog, k4, k2tog, k6 (36 stitches)
Rows 30-31: knit
Row 32: ssk, k3, ssk, k3, ssk, k6, k2tog, k3, k2tog, k3, k2tog, k6 (30 stitches)
Rows 33-34: knit
Row 35: ssk, k2, ssk, k2, ssk, k4, k2tog, k2, k2tog, k2, k2tog, k6 (24 stitches)
Rows 36-39: knit
Pull your cast on tail inside & weave it in. Also start stuffing the body, stuff it pretty tight to get the shape you want.
Row 40: kfb, k2, kfb, k2, kfb, k4, kfb, k2, kfb, k2, kfb, k6 (30 stitches)
Row 41-42: knit
Row 43: kfb, k3, kfb, k3, kfb, k6, kfb, k3, kfb, k3, kfb, k6 (36)
Rows 44-47: knit
Row 48; ssk, k3, ssk, k3, ssk, k6, k2tog, k3, k2tog, k3, k2tog, k6 (30)
Row 49: knit
Row 50: ssk, k2, ssk, k2, ssk, k4, k2tog, k2, k2tog, k2, k2tog, k6 (24 stitches)
Row 51: knit
Row 52: ssk, k1, ssk, k1, ssk, k2, k2tog, k1, k2tog, k1, k2tog, k6 (18 stitches)
Row 53: knit
Embroider or sew on the face at this point. The column that is six stitches wide is the back & the front is the area between the ssks & the k2togs. Then stuff & shape the head.
Row 54: ssk, ssk, ssk, k2tog, k2tog, k2tog, k6 (12 stitches)
Row 55: ssk, ssk, ssk, k2tog, k2tog, k2tog (6 stitches)
Add any additional stuffing you need for the head. Cut yarn leaving about an 8-inch tail. Thread tail onto a tapestry needle & thread through the 6 stitches on the needles. Pull tight & weave in the end.
Ears: (make 2)
Cast on 10 stitches. Divide evenly between 3 needles. Join together being careful not to twist. Place a marker between the first & last stitch to mark rows.
Rows 1-12: knit
Row 13: ssk, k3, k2tog, k3 (8 stitches)
Row 14: ssk, k2, k2tog, k2 (6 stitches)
Row 15: knit
Cut yarn leaving a tail. Thread tail onto a tapestry needle & thread through the 6 stitches on the needles. Pull tight & weave in ends.
Tail:
Cast on 14 stitches. Divide evenly between 3 needles. Join together being careful not to twist. Place a marker between the first & last stitch to mark rows.
Rows 1-4: knit
Row 5: k2tog 7 times (7 stitches)
Row 6: k2tog, k2tog, k2tog, k1 (4 stitches)
Cut yarn leaving a tail. Thread tail onto a tapestry needle & thread through the 4 stitches on the needles. Pull tight & weave in ends.
Feet: (make 2)
Cast on 8 stitches. Divide evenly between 3 needles. Join together being careful not to twist. Place a marker between the first & last stitch to mark rows.
Rows 1-6: knit
Row 7: k2tog 4times (4 stitches)
Cut yarn leaving a tail. Thread tail onto a tapestry needle & thread through the 4 stitches on the needles. Pull tight & weave in ends.
Arms: (make 2)
Cast on 6 stitches. Divide evenly between 3 needles. Join together being careful not to twist. Place a marker between the first & last stitch to mark rows.
Rows 1-6: knit
Row 7: kfb k1, kfb, k1, kfb, k1 (9 stitches)
Rows 8-10: knit
Row 11: k2tog, k2tog, k2tog, k2tog, k1 (5 stitches)
Cut yarn leaving a tail. Thread tail onto a tapestry needle & thread through the 5 stitches on the needles. Pull tight & weave in ends.
Finishing:
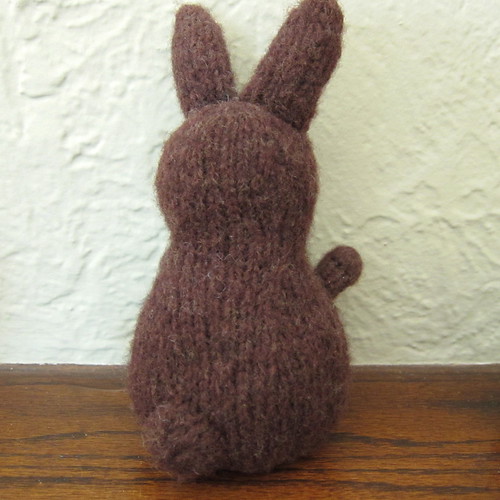
Put a little stuffing in the arms, legs & tail (a knitting needle can help push it into the arms). Using the pictures as a guide, sew each piece into place. The legs will help make the bunny stand on it’s own.
If you find any errors in this pattern please let me know so I can correct them.
Copyright 2008 Kathy Lewinski
Justcraftyenough.com
Do not sell or duplicate this pattern. Do not sell items made with this pattern. Do not teach this pattern without my permission. Thank you.
© 2005 – 2012 Kathy Lewinski & Susan Cornish


Super cute! I love it.
Very cute and guilt free!
Very cute. Thanks very much for sharing your pattern.
Pingback: mumblings » Blog Archive » A little linkity with your latte
Very cute. Thanks for the no calorie chocolate bunny pattern.
What a cute pattern. I thnk I will also make one in a gray tone fuzzy yarn. My little 2 1/2 year old granddaughter and the 16 year old will both like them:)
Would you by any chance have a pattern for a knit three hole ski mask for a boy age 11. I only have straight needles (no round ones). He is small for his age so a size or two smaller would work too.
Thanks so much for sharing.
Laura
Laura – sorry I don’t have a pattern for what you are looking for. I would try looking on Ravelry.
Thank you for sharing this pattern. I am going to make one for my sister who loves chocolate as much as I do…love the name!
Pingback: Easter Project Inspiration | Urban Folk Circuit
Pingback: craft | Pearltrees
Pingback: Easter: Calorie Free Chocolate Bunny | Crafts: Unknown Knowledge | Scoop.it
Pingback: Калория свободный шоколадный кролик | Вязание спицами и крючком
Pingback: Freebie Easter Crochet and Knit Pattern Round-Up | Nittin' Ninja
Pingback: 20 Super Cute Knit Easter Patterns - Knits' End
Pingback: Easter Knitting Patterns - Red Ted Art's Blog