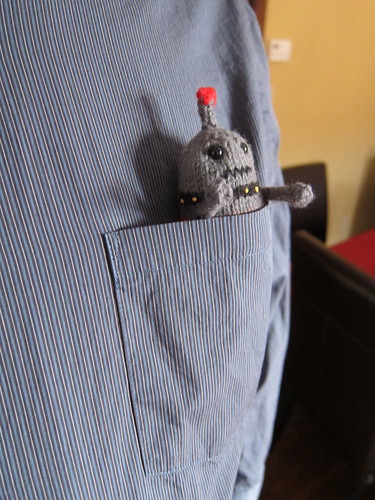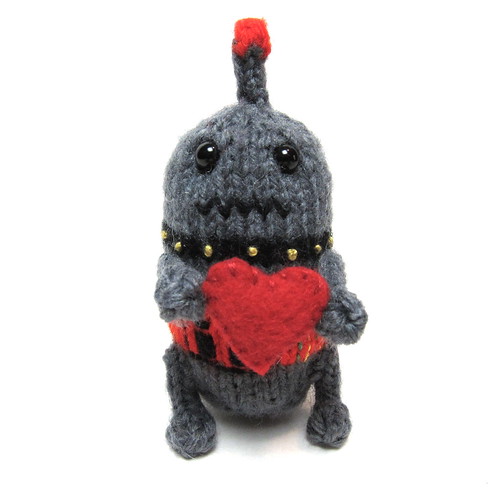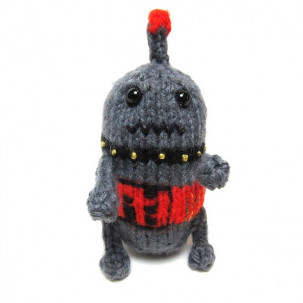
Here’s a fun little knit I whipped up as a present for Matt. He can be knit up super quickly & is a great use for scraps of yarn. This was my first time using safety eyes & I love the expression that add to the face.
Part of the fun of this robot is that he could be embellished is so many ways with stripes, embroidery, beads, buttons or anything else you can think of. Even different weight yarns add some interest, my red was slightly thicker than the grey which makes that stripe of color puff out slightly for a nice effect. I’m thinking of making one that looks like R2D2 with 3 legs & no arms.
You can use any yarn & size needles you want for this project, you’ll just end up with a bigger or smaller robot based on what you used. The main thing is to knit tightly so that the stuffing is held in nicely. The details below are what I used.
Supplies:
Four size 5 double pointed needles
tapestry needle
2 safety eyes
embroidery thread (optional)
poly-fil stuffing
Kfb – Knit into the front & back of the same stitch, increasing one stitch
Ssk – Slip the first two stitches off the left needle onto the right needle as if to knot. Insert the left needle into the front of these two stitches & knit them together (left slanted decrease)
K2tog – knit two together (right slanted decrease)
Body:
Cast on 6 stitches. Divide equally on 3 needles. Join together being careful not to twist. Place a marker between your first & last stitch to mark rows.
Row 1: kfb into each stitch (12 stitches)
Row 2: k
Row 3: kfb, k1, kfb, k1, kfb, kfb, k1, kfb, k1, kfb, k2 (18 stitches)
Row 4: k
Row 5: kfb, k2, kfb, k2, kfb, k2, kfb, k2, kfb, k2, kfb, k2 (24 stitches)
Row 6: k
Row 7: kfb, k3, kfb, k3, kfb, k4, kfb, k3, kfb, k3, kfb, k2 (30 stitches)
Row 8 – 27: k (this is where you can have some fun & add block or stripes of color)
Pull your cast on tail inside & weave it in. Now is the time to add the eyes, face & any other embroidered embellishments. Where you started knitting is the head of your robot. I placed the eyes right in the (kfb, k4, k2tog) section of the head. Stuff robot as much as you can at this point.
Row 28: ssk, k3, ssk, k3, ssk, k4, k2tog, k3, k2tog, k3, k2tog, k2 (24 stitches)
Row 29: k
Row 30: ssk, k2, ssk, k2, ssk, k2, k2tog, k2, k2tog, k2, k2tog, k2 (18 stitches)
Row 31: k
Row 32: ssk, k1, ssk, k1, ssk, k2tog, k1, k2tog, k1, k2tog, k2 (12 stitches)
Row 33: k
Row 34: ssk, ssk, ssk, k2tog, k2tog, k2tog (6 stitches)
Add any additional stuffing you need. Cut yarn leaving about an 8-inch tail. Thread tail onto a tapestry needle & thread through the 6 stitches on the needles. Pull tight & weave in the end.
Antenna, Arms & Legs:
Make 1 antenna, 2 arms & 2 legs (or make more for an even funkier robot).
The antenna, arms & legs are all made the same way. Except for their length & the red on the antenna.
Cast on 3 stitches & knit an i-cord. (Here are instructions on knitting an i-cord.) Work 4 rows for the antenna, 5 rows for the legs & 6 rows for the arms.
Now, you will increase & decrease to create the bobble. You are still knitting an i-cord while doing this. If you want color on the end like my antenna switch your colors at this point.
On the next row kfb into each stitch giving you 6 stitches. Knit the next row. Next row K2tog three times giving you 3 stitches.
Cut yarn leaving about an 4-inch tail. Thread tail onto a tapestry needle & thread through the 3 stitches on the needles. Pull tight & weave in the end. Use the tail to sew the antenna, arms & legs on to the robot as shown in the pictures.

For Valentine’s Day I sewed a little stuff heart for him to hold & gave this to Matt as his valentine.
Copyright 2010 Kathy Lewinski.
Please do not sell my pattern, claim it as your own or teach it in a store without contacting me. You may link to it from your blog or site.


Such a sweet little robot (can robots be sweet?), lol. I'm adding your pattern to my projects to do list right now. Thank you!
Bobbie
http://www.shimmeringsky.ca
I can't knit to save my soul, but this is super kewt. It made me laugh out loud the moment I saw this little robot.
Oh. My. Goodness. So incredibly cute!
I like the little hands.
This is cute! I found you via craftgawker and added this page to stumbleupon, hope that's okay!
This is a great tutorials. thanks, there is also one blog that i like.
This is absolutely adorable. I crochet up a storm but have trouble with knitting. You may me want to knit!
SO SO SO CUTE! we have a friend nickname robot…i can't wait to make one for him!
Very very sweet hand-made things.
Hand made things really have attraction..
Its great resource. i was finding that type inf and now i get it.thanks for this…
Thank you very much. I'm going to knit him to go in the pocket of Katie's Rocket Ship at
http://caffaknitted.typepad.com/caffaknitted/rocket-ship.html
This is too cute! And your photography of it is phenomenal. I featured it today on my Ideas & Inspirations post!
Katie P
Food, Wine, & Mod Podge
What a useful robot.
If I can get my printer to cooperate, I’m going to print this so I can make it for my grandson!!! Too Cute!!!
Pingback: Knitting - make | Pearltrees
Pingback: Pocket-sized Robot ⋆ Knitting Bee